Who’d have thought…just six months down the track since the ‘last wrap’ podcast episode, that the world would be in this tumultuous state? Guess it goes to prove none of us can ever tell just what may lie around the corner….
In fact, much has happened since I wrapped up the last episode, when you may recall we were in severe drought and I even mentioned the possibility of ‘mothballing’ the kitchen garden if it really came down to it. Yes…it was that bad. You will also recall I wrapped just before our open garden, celebrating 30 years at Glenmore. It was a weekend packed with delight; for us, our stall holders and our many visitors…and the garden itself looked pretty magical too – even in those dire circumstances. Ten days later though, it was a very different atmosphere that pervaded these parts, as the fires came much too close for comfort. Like so many, we spent week on week glued to the fire-app, hoses at the ready…and then miraculously…it rained. It rained so much our empty dams first filled, then overflowed and the creek ran for the first time in three and a half years. We were overjoyed….and then…well…you all know what happened next. This time it’s not just the drought and fire ravaged but the entire world in a state of despair. And we must all do what we can. For the most part, so far I’ve gone gardening….
To be honest, at this time of the season, that’s not at all unusual…it’s what I always do anyway – squeezing in as much time in the kitchen garden as possible between other jobs because it’s crop rotation time: now (and again in the spring) are the busiest times of the year – whatever the external situation may be. Then once the main planting is done, as it is almost, I can get back to other projects. Hence being able to write these notes!
The difference this time around here, is that with the girls home* and Larry too (who usually travels so much); despite having no events to cater for (which is of enormous sadness on many levels), I need to provide even more fresh produce on a daily basis than usual, to ramp up production to feed us all. The garden must do better. I must do better…which is causing me to hone my approach. Bunker mentality? Perhaps. But this season more than ever, there will be no lazy space left vacant in the kitchen garden. Aside from wanting to provide as much of our own produce as possible, for all the usual reasons…organically grown, garden to plate eating simply is the best, I think it imperative that we not take things from the shelf that others who don’t have the opportunity to provide for themselves may need. If we can…we should. And also…it means we can stay home and be out of everyone’s way.
Although these notes don’t have an accompanying audio (I’m pretty sure you must have my voice in your heads by now!), I hope they’ll go some way to putting an updated spin on the podcast episodes…for late summer/autumn anyway. If you’re new to this space…do please revisit the audio episodes (and the accompanying notes!)…they began in spring 2018 and continued monthly for a whole year. To keep going I would simply be repeating myself, because I follow the same pattern year in, year out, season in, season out. Of course, the weather patterns will always be marginally different and this year, so far, they’re more kind than they have been in years…the climate, just now, is pure bliss, and the earth is retaining moisture like it hasn’t done for so very long. There’s always some new little thing though, even for me, to pick up and run with, so I’ll reiterate the list of autumn tasks and planting (for winter growing and predominantly spring eating, with a drip, drip, drip of produce all the way through hopefully!) below.
I know there are many peeps new to growing this year, so if I’m being a bit repetitive, well…pretend for their sake that it’s all a lovely surprise. There’s one aspect I spoke much of throughout the podcast series….the value of seed. And right now I’d say it’s the most important topic of all…collecting it, banking it…I’ll focus more on that point below because it’s a whole method of gardening in itself. All in all, I think I’ve planted better this time around, so hopefully these notes will provide you with some reassurance in your own garden..here we go!
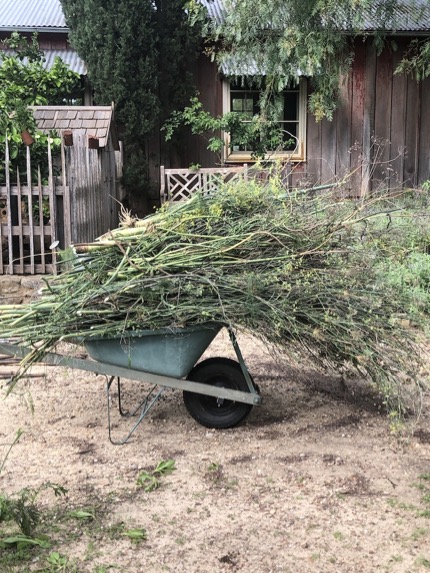
Let’s begin at the very beginning of the autumn crop rotation process. First there was the task of pulling out spent growth, which you know is a big job! Barrow after barrow of it headed down to the compost…
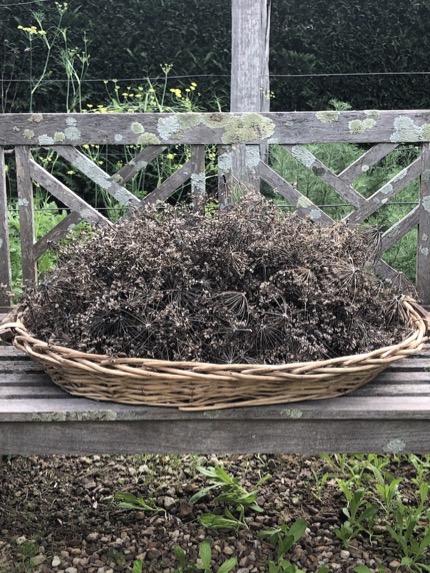
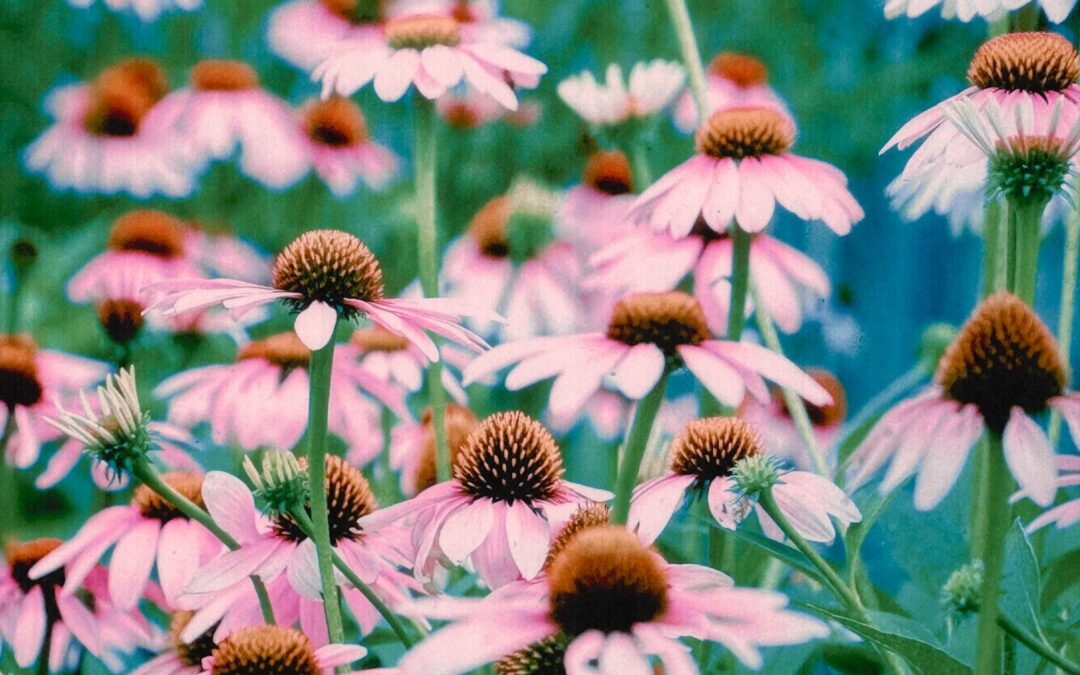
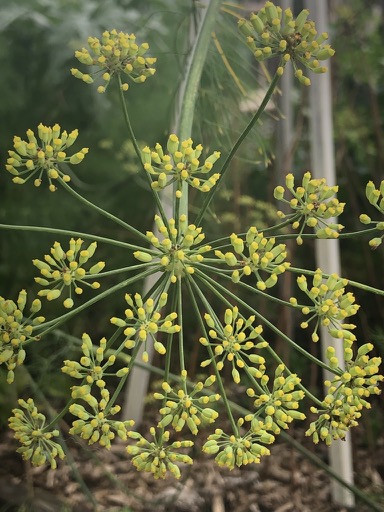
Of course I was sure to collect seed as I went. As usual, there were abundant fennel heads! I’ve since shared many…mostly with the visitors who came here before we all went into isolation. Many tell me they sprinkled the seed with the next shower of rain and now they too, have their very own fennel cycle underway! Just like me, they can ‘forage’ to weed out the many tiny seedlings that have appeared and eat them, while leaving many to develop into strong plants over the coming cool months. Those left to develop will flower in the spring, when in turn they will become excellent companion plants, bringing in plentiful insect life, as well as look enchanting, yield fresh seed to eat and ultimately, as it dries, another quantity of seed to expand next year’s sowing. (For further explanation of the fennel cycle, please revisit episode five of the podcast and notes). I think growing fennel is a win/win on every level…it’s beautiful to look at, edible at every stage (don’t forget to eat fresh fronds – episode three!) and a good companion…what more could you possibly ask of a plant? Oh…and if you bring the dried version inside on a bit of a big scale…its presence will swamp the space with dusky scent!
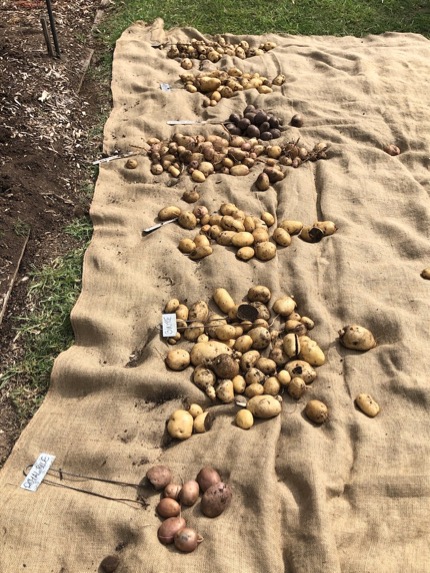
Next I dug the potatoes to free up some space down the back. I’d been digging a few at a time since early December, and as things stand now…with them stored in the cellar, we should have enough to get us through another month or so. Some are beginning to shoot and of course I can’t stop them! (By the way, don’t forget to order seed potatoes for planting towards the end of August). Although it may not look like so many here, accumulated in small sacks is another matter! There have been more than enough for a family of four and…we had one quite large event before we went into shut down, when I piled lots onto a plate to accompany a delicious autumn lunch…
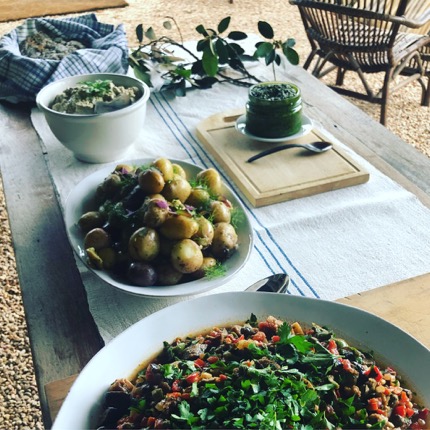
Their taste, texture, and many colours….pink blotched King Edwards, purple Sapphires and all the waxy yellows and whites, were much appreciated. The event followed a talk I’d given the previous month and I have my fingers crossed there will be many converts to growing their own potatoes this year!
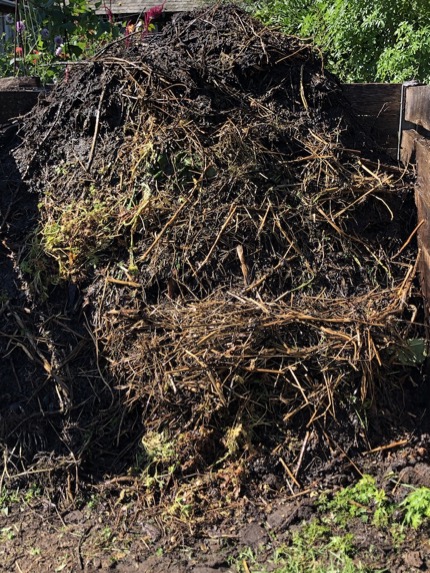
Before we get stuck into the details of autumn planting, I must just mention compost…because without it, no planting can begin at all. This meant one final turn for the heap that had been on the go since the previous spring; and while we were at it, combining two mountains of fresh material we’d gathered through the late spring and summer months. Some of you will recall I had a crazy idea to film the compost turning process one day…on high speed! Well…at last Bonnie was here to capture it as Larry and I went about our work, so if you feel like a good chuckle, you can see it here! (And you can find comprehensive compost notes and audio in podcast episode two).
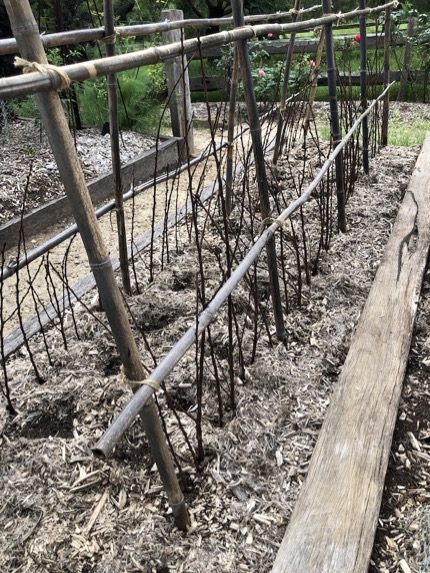
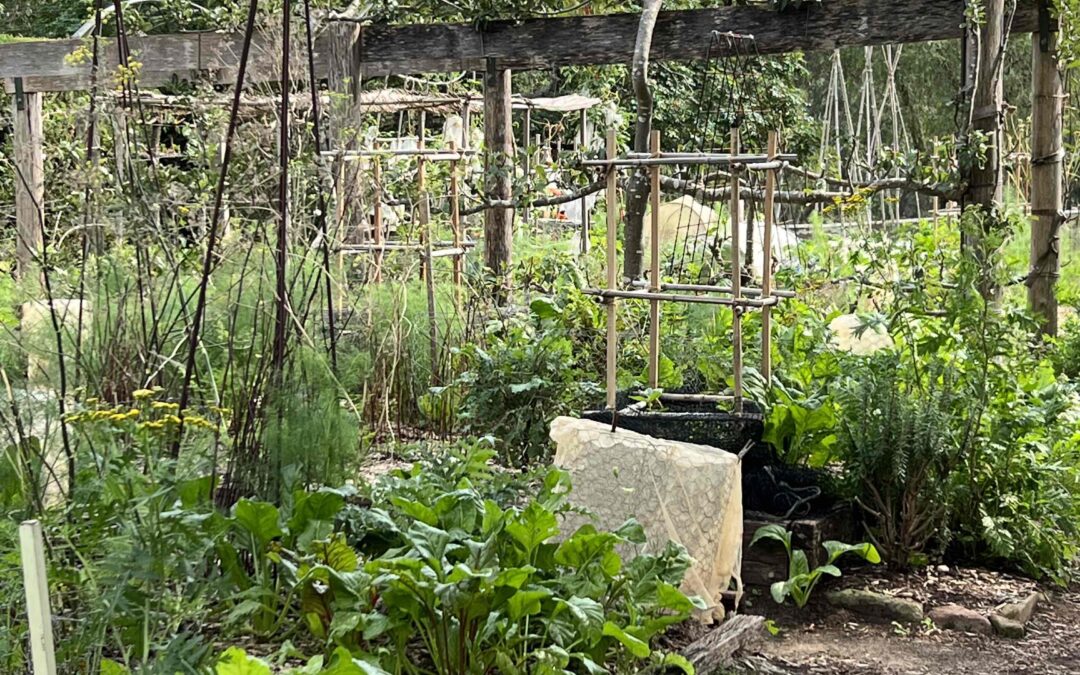
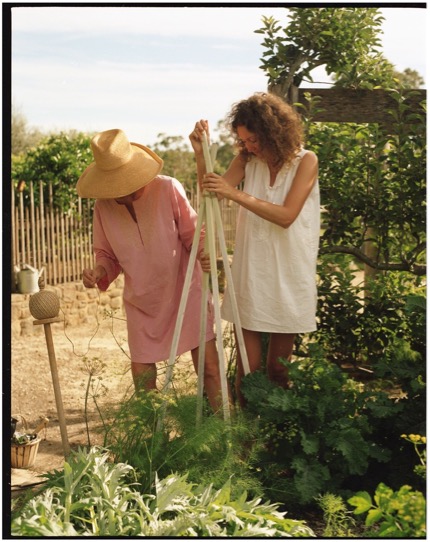
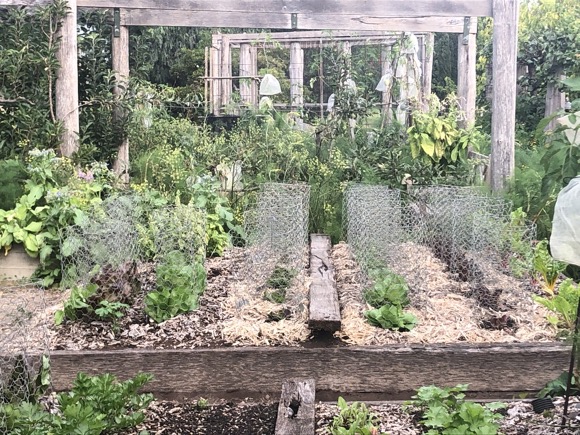
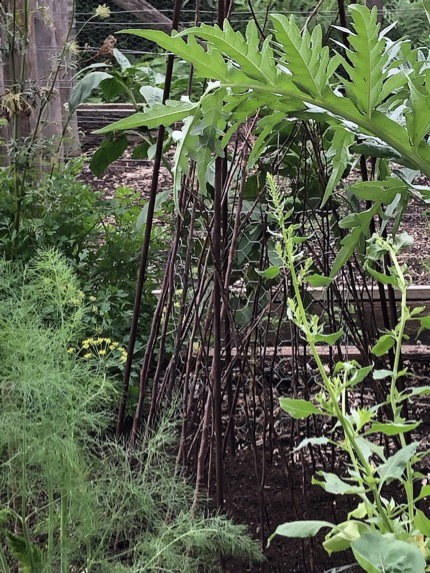
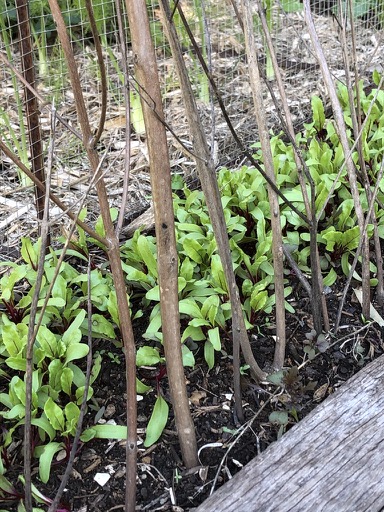
Next it was time to build structures in the legume bed. It’s important to tackle the jobs in order, and building tunnels and wigwams must be completed before pea and broad bean seed can be sown.
So…after taking out the spent summer growth, I aerated the soil by plunging in the border fork over and over again, just to the depth of its tines. While I don’t like to invade the soil structure too much (I don’t turn it over), I do find it’s often quite compacted at the end of the season, and has been especially so during the big dry.
After aeration, we used boards to tread on while building the structures, and then gently dropped new compost inside and all around the newly built pea tunnel, wigwams and broad bean box, before adding mulch, pea sticks and lastly…sowing the seed.
The continuous broad bean box on this traditional side of the garden works well with the length of the bed here (I make ‘individual’ boxes over on the guild side of the garden…so don’t be put off by the length of this one). These days, the uprights are always tomato stakes, but I still use bamboo rods for the horizontals. There are three heights of horizontal rod, and divisions across the structure, in order to support the fragile broad bean stems as they grow. And they do grow to be very tall, needing all the support they can get in the likely strong spring winds, when they’re laden with flowers and bean pods. Their stems are too fragile to stake individually, so please, please make use of this method! Five seeds per square (in the pattern of the number five on a dice) will ensure they self support within the frame. All you need do, is to make sure there are no escapees from inside the frame…which calls for a simple daily check!
The base of the broad bean box is wrapped with wire in the hope of keeping out all pests during the delicate germination stage. And there the wire will remain: once the foliage grows, it disguises the wire, and there should be no need for me to access the base of the plants once the seed’s sown.
By the way, broad beans are a long term crop…taking up space throughout autumn, winter and spring, so you need to take the space they use into consideration in your planting scheme. It may seem to you like a lot of space devoted to one variety of veg but oh boy…if you’ve never eaten home grown broad beans I just can’t begin to explain the treat you’re in for when you do! (See plentiful references scattered throughout previous podcast notes…including eating the tips and double-shelling in episode two!).
Alongside the broad bean box I run a tunnel for peas. (Like beans in the summer), I choose to grow climbing peas. Both for the same reasons – one aesthetic and one practical. On the aesthetic note, tunnels and wigwams add so much charm to the garden in their own right…creating height, interest and structure. When newly built and bare, I enjoy their individual forms in their own right, then later in the season, heavy with billowing foliage, flowers and pods, they are a vision to behold.
On a practical note, I find that bush varieties tend to dangle their pods low to the ground and often get into a tangled, disease ridden mess.
So…when growing climbing varieties, the upright rods (in both cases) support the stems that shoot skywards. In the case of peas, they especially need support in the early stages, when their first fine tendrils need to wrap themselves around something for a leg-up, so they don’t flop around on the ground where young stems can rot. Which is why I ram in lots of old prunings (that I specifically set aside each year) for those early tendrils to get a grip; while their main stems slowly strengthen.
Another point to note is that I always sow pea seed (rather than seedlings). I find they get off to a much better start in life, ensuring vigorous growth from the outset, with no transplant shock to those fragile young stems. (I have experimented a few times with seed in punnets..even as late as last year when I was having so much difficulty with bower birds here, but still find seed direct into the ground is a better bet).
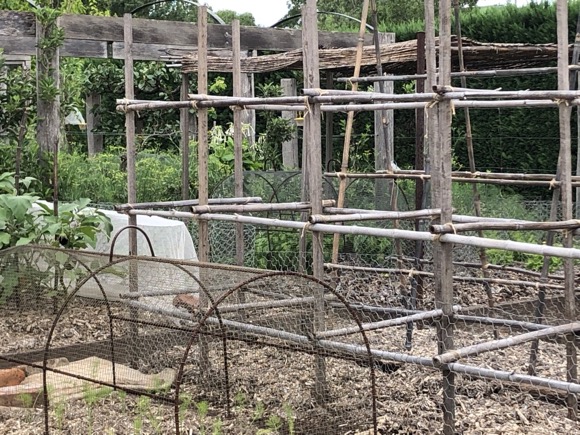
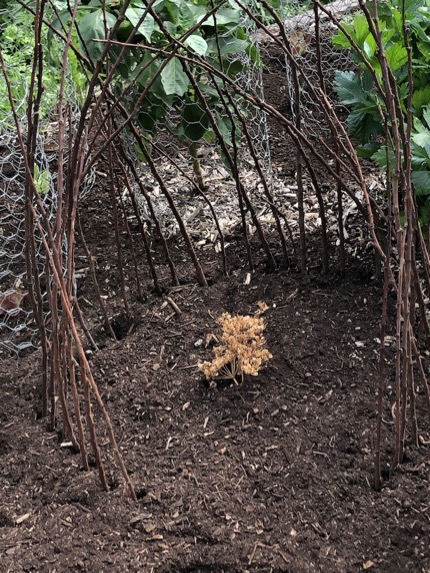
Over the years, I’ve taken to laying out the legume bed on the traditional side of the kitchen garden in the same pattern: a pea tunnel to the rear, the long broad bean box down the centre, and a wigwam for peas to each front corner. Which leaves a space at the front between the two wigwams that neatly fits my wire tunnel. Once upon a time, I used to make a separate panel for more peas, but given I don’t seem to be able to keep up with the number of fennel bulbs we consume, I decided to devote this little patch each year to fennel seedlings. These tend to be the first fennel seedlings of the season I plant and consequently, will be the first we eat. (Successional sowing and planting…I know I go on and on about it but it’s with good reason!). As we do make our way through those first bulbs to mature…I’ll replace them with lettuces, because by then, it will be too late in the season to plant more bulbing fennel and expect it to swell successfully and…I try not to continuously plant the same veg in the same place).
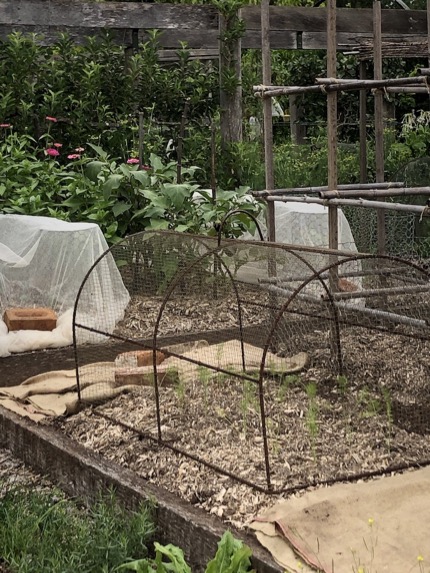
You can see in this image where I’ve covered exposed soil with hessian, prior to building the wigwams. I don’t like to leave bare earth exposed to the elements for a moment longer than is necessary and find hessian to be a cheap and useful material to do the job. Ultimately…it all ends up in the compost.
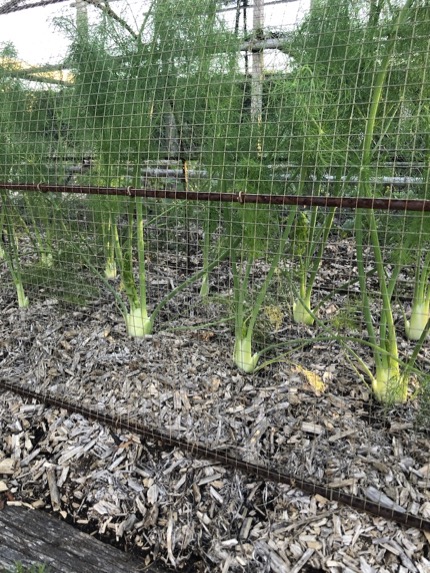
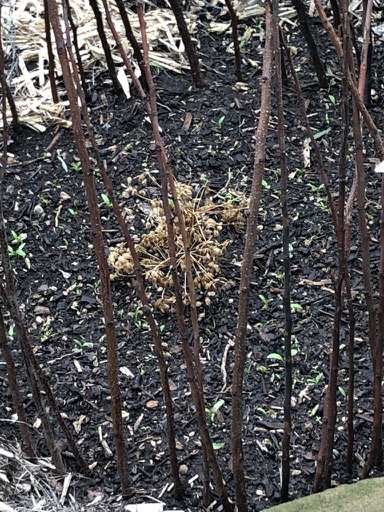
Just one month later….these first fennel bulbs are well on their way…(while elsewhere in the garden I’ve been planting out a few at a time…dribbling them in….to extend our eating period).
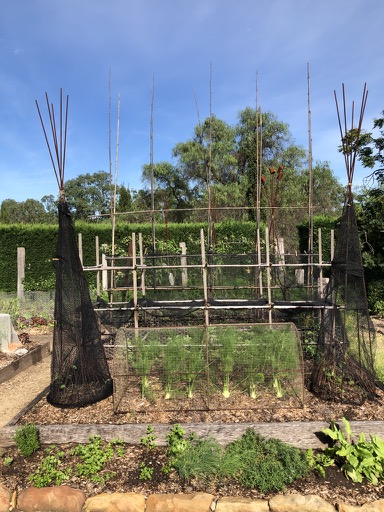
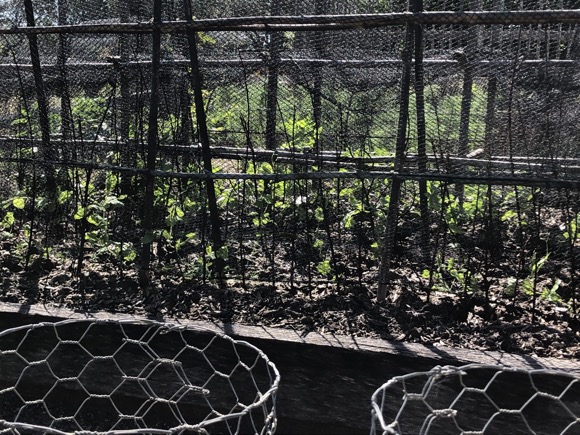
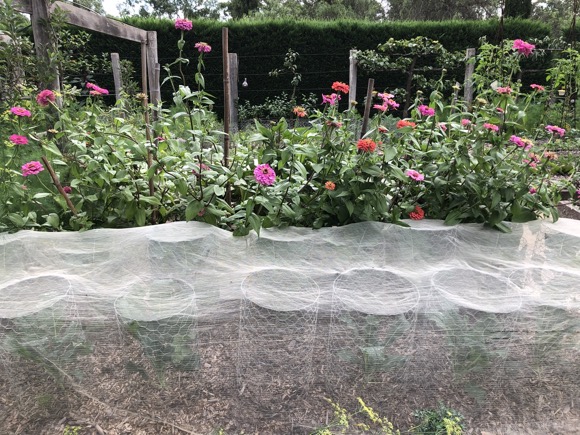
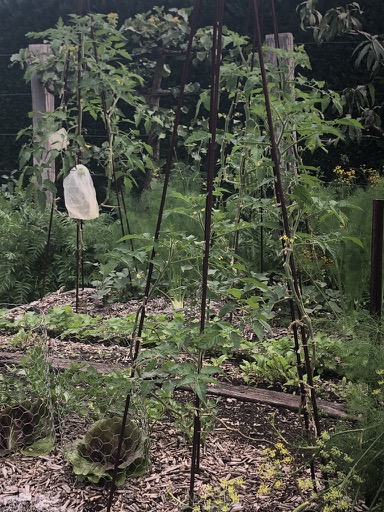
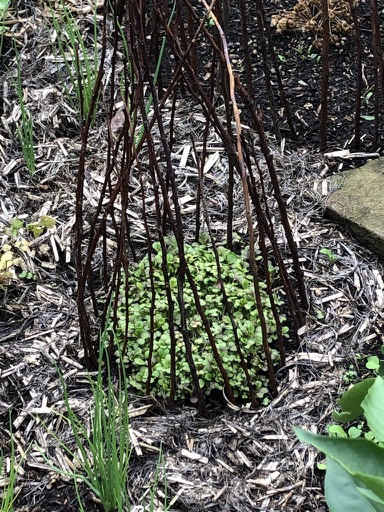
So here we have the legume bed – prepped, built, sown and planted for the season ahead. Although it’s a shame about the nets, they’re temporary, but there they must stay ’til the pea stems are strong enough to withstand attack. It’s primarily bower birds I’m protecting them from at this young stage and once they’re more sturdy, I’ll be able to take the nets off and allow the stems to fend for themselves. One big annoyance about the nets (aside from the visual aspect) is that the pea tendrils are inclined to wrap themselves into it, so if you do this too, you need to be vigilant and gently untwine any net-bound tendrils around a pea stick instead, or you’ll have a helluva mess to untangle when comes the time to remove the net…hopefully in just a few short weeks!

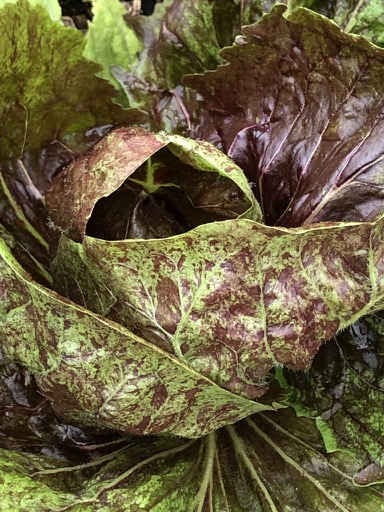
Next, let’s take a look at the winter ‘brassica’ bed. Podcast followers will recall how I plant two beds of leafy greens on the traditional side of the garden in the winter months: because the winter growing brassicas join this family, thereby increasing its number, so they require double the space. (But as there are no winter fruiting veg, one of my four rotation beds is nominally ‘free’ during the winter, so I use it for this increased number of leafy greens…please refer to the podcast intro for a full recap!). The brassicas include kale, broccoli, cabbage, cauliflower, kohl rabi, and brussels sprouts and as many of you know, I like to grow their blue/grey, sometimes purple veined foliage separaely from the more vivid colours of lettuces, spinach and chard…it’s a weird personal thing about colour – you don’t need to follow suit!
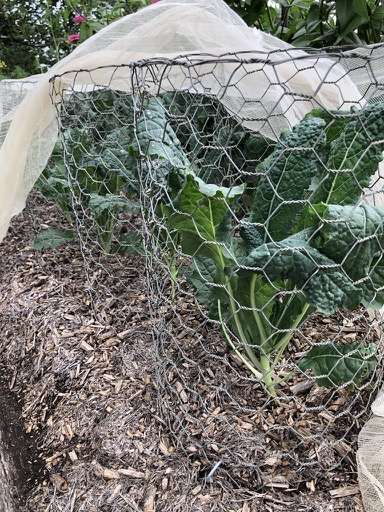
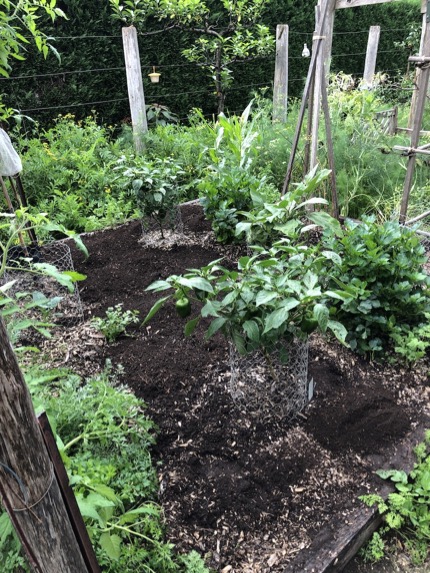
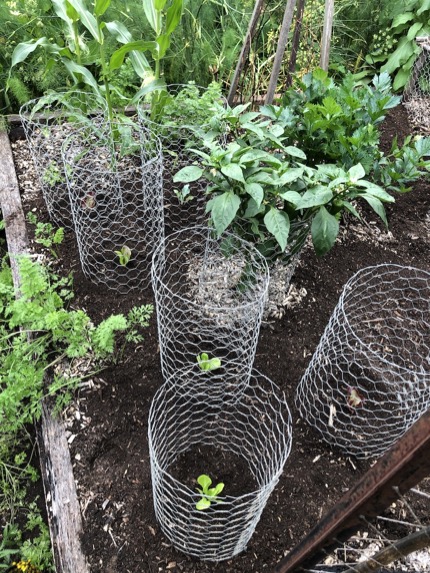
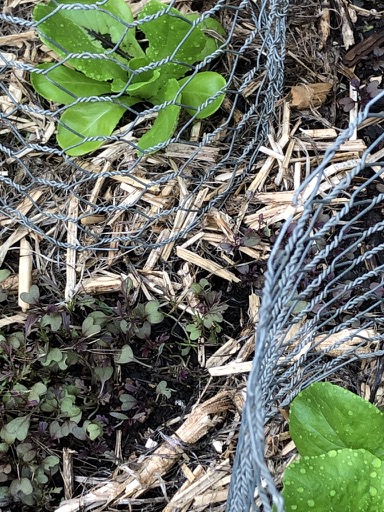
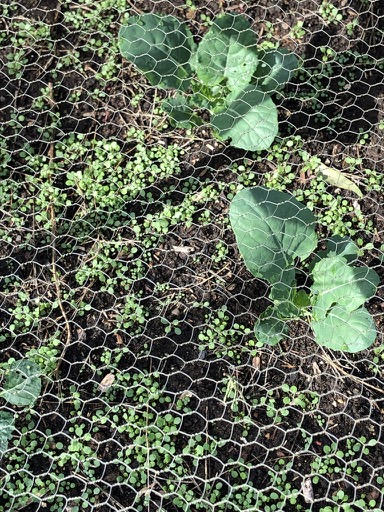
You can see here that I planted tiny new seedlings into cylinders for protection…from birds, rabbits, possums and any other likely local pest….goats…deer?). I’ve planted a row of black Tuscan kale (cavolo nero) at the front and a row of broccoli behind; with a mixed row of cabbages and cauliflowers behind the zinnias and aubergines that still linger from the summer season.
Then covered them with net, to protect them from the white cabbage moth who is drawn to this family for its egg laying like a magnet. Again, the net won’t be there for the entire season, but while the weather is still so warm, the moths are fluttering about all over and should I miss a tiny yellow egg laid on the underside of a small leaf…the emerging caterpillar could do a lot of damage before I even notice!
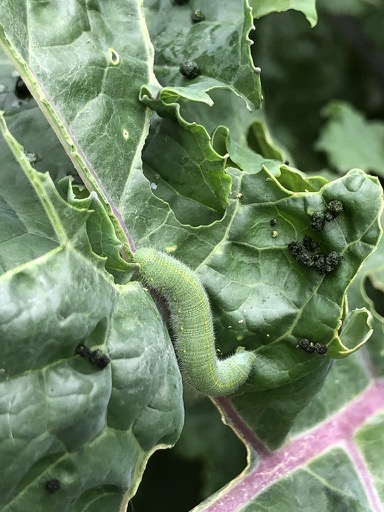
As you can see here! I snapped this pic on a mature kale plant over on the guild side of the garden. Once again, podcast listeners & readers will recall how I always leave in a ‘decoy’ plant or two…a sacrificial kale as it were, from the previous season to (hopefully) attract the white cabbage moths so they lay there, rather than on my tiny new seedlings whose leaves could be munched in a minute! While I’m sorry to see this old kale under attack (it’s been a splendid specimen for months on end), it is on its way out, providing me with regular leaves to toss to the chooks (in this case, a caterpillar sandwich!). So for awhile, the nets on my new seedlings must remain.
But peek underneath and just a month on…look how they’ve already grown! While I could begin to pick some of the kale leaves, I’ll wait ’til the stems are more sturdy and plants more mature…we need to be patient in the early stages – a strong plant will yield a better crop of leaves down the track. And…as the old saying goes…the leaves will taste sweeter after they’ve been dusted by a frost. So for now, they can grow on without interference. It will be some time too, before the broccoli sets a lovely head…but when it does, I’ll cut out the centre and await the many side shoots that follow. We’ll be eating from both these rows all the way through winter and spring.
Before we leave this little plot though, I’d just like to consider some timing, planning and aesthetic points. First, at this stage of the season we’re still very much betwixt and between….with a chilly day here and there and Indian summer ones in between (as is always the way), so it’s hardly surprising the garden is ‘one foot in, one foot out’ of each season, as it were. And this is how crop rotation and the seasons really unfold. There’s never a completely clean sweep of the kitchen garden in our climate: I don’t pull everything out and plant all anew…it’s a slow progression that takes a couple of months. For instance, if you go to the first image in this brassica section, you’ll see that when I planted out the tiny brassica seedlings, the shade canopy was still over the ‘summer leafy green’ bed behind…(you can just see the panel of willow in the top right hand corner). It’s gone now though and has been for a few weeks, which altered the entire atmosphere of the kitchen garden overnight…(it now looks positively bare by comparison).
On timing and planning….over the years I’ve discovered I can time plant combinations that bring me joy from a visual perspective, as well as working in the rotation process on a practical level. A good example is the aubergine, zinnia, brassica combination! On a practical note, both zinnias and aubergines will come to the end of their natural life at around the same time the broccoli, caulies and cabbages are ready to burst out of their cylinders. So when I pull the two lingering rows from the summer season out, the brassicas will be able to spill out into the space they’ve hitherto occupied. In the meantime, the newly planted bed doesn’t look empty. Instead it looks rather enchanting…in a *kitchen garden kind of way…flowers on high and stakes askew (thanks to last week’s ghastly wind gusts).
*For a little tangent on growing rows of cutting flowers in the kitchen garden…you could pop down the rabbit hole of the notes for podcast episode six!
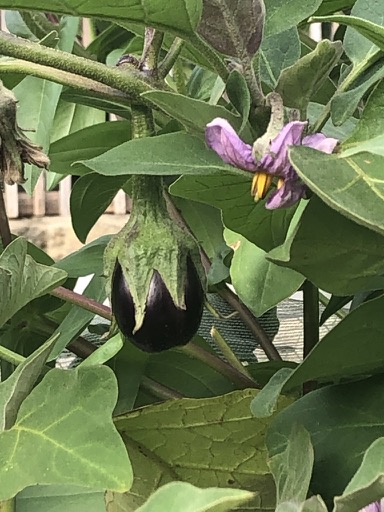
So there are aubergines to eat and flowers to pick; and I get to enjoy one of my absolute favourite combinations in the garden – that of the row of mature aubergines showing off their dark globular fruits, still with tiny mauve flowers announcing the possibility of more to come, set off alongside the romping row of zinnias with their miraculous scaled buds and vibrant pink flowers. All amidst the burgeoning grey-blue-green / purple veined brassica foliage.

To achieve this personal folly, at the beginning of the summer growing season, I plant the row of aubergine seedlings and sow a row of zinnia seed next to each other in the bed that will become the brassica bed the following season. In fact, both aubergines and zinnias look fairly unremarkable throughout the hot summer months and really only come into their own in the autumn. This is fun, both in the planning and the delight I derive when and IF it all comes to pass! For me, this is about play and these are the small things that make me smile. (I just can’t wait to take the nets off to get the full effect!).
Time to move on…goodness…there I go again…another tangent…sorry! Next is the second ‘leafy green’ bed for the winter season, which I know is a bit confusing. In the great scheme of things, if I wasn’t breaking the rules of this ‘traditional’ layout and method (which I keep going because it’s such a good teaching tool), this bed should be left fallow, or I should sow a green manure crop and ‘rest’ it…because…this was the summer leafy green bed and so in planting it up again with the same family, I’m neither resting or rotating it. But as I take good care of my soil / compost, and really can’t afford to waste the space, I’m really not concerned.
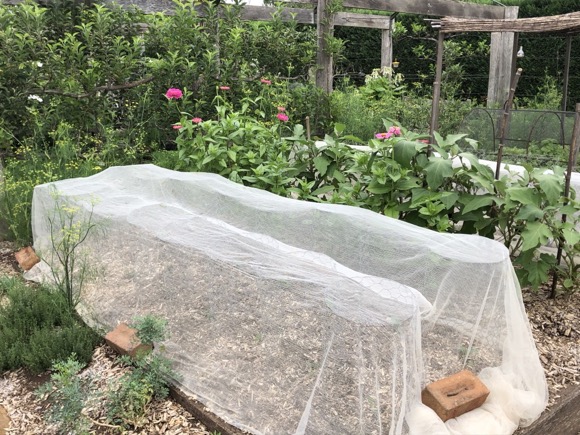
Throughout the summer months, this bed was covered with a shade canopy, allowing me to successfully grow non-hearting summer lettuces. When the canopy came down, the entire bed was gently aerated and topped up with fresh compost, then mulch. And we got to work planting out rows of lettuce. On the far right, the row of coloured chard has been in position all summer long and now the canopy’s off, should grow stronger by the day. We’ve eaten at least a leaf or two from it throughout the hot months, and chard is one of the rare veg that last beyond one season….it can sometimes last for eighteen months or so before bolting to seed.
I’ve planted a row of butter lettuce, a row of mignonette and a row of radicchio….all favourites. The left side of the bed is still a mish-mash…I planted half a dozen lettuces at the front simply to get some underway in a momentarily empty spot – podcast followers may recall I planted a square of potatoes in this corner in an attempt to improve the soil last spring…the result was a good little patch of potatoes and the soil looks beautiful. Behind is the last of the summer basil, literally on its last legs now and heading for a jar of pesto. I can’t wait to pull all this mess out and plant two more rows of lettuce to tidy it all up…but…thanks to those interim plants still being there, it’s causing me to stagger my planting…and we must remember that produce for the kitchen is, in fact, more important than the look of the garden. I don’t want to eat all my lettuces at once, so I mustn’t plant them all at once! While part of me is simply longing to tidy up, good sense is holding me back and will temper my impatience for a couple of weeks yet!
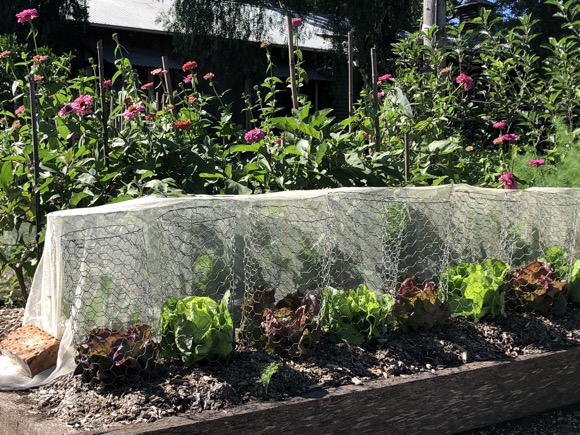
As there was a little vacant space along the edge of the bed next door, I thought I could get away with a quick row of lettuce during the rotation process, before the brassicas get too big. Now you know my aversion to vibrant lettuces growing alongside the brassicas, I can assure you this is a temporary measure! (Although I admit the lettuces look very attractive just now, with the brassicas hiding under net and the zinnias in full swing!).
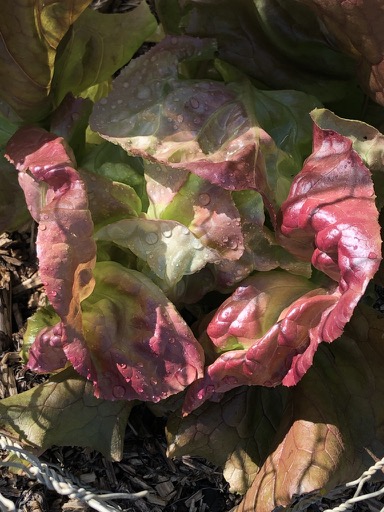
The ‘butters and mignonettes’ are simply loving this spot and we are enjoying the simply exquisite, soft ruffled leaves of these favourite hearting beauties on our plates – the first we’ve eaten since before the long hot summer. I’m always sure to begin successionally planting these two wherever I can find space, just as soon as the real heat dissipates.
Similarly, I popped a row of radicchio along the edge of the new season’s winter root veg bed while it too, is in a stage of flux. They will slow down my eagerness to sow another row of carrots, beetroot or parsnips, while the first ones get a kick along…causing me to successionally sow! In the meantime, we have beautiful speckled leaves to add to leaf salads too.
The winter root veg bed is the last of the four rotation beds on the traditional side of the garden. Because it was the ‘fruiting veg’ bed during last summer, there’s still a lot going on here; which is always the case: those summer fruits are not quick to give in! In fact, they’re inclined to hit their stride in the autumn, making ‘rotation’ into the next season a very staggered process indeed.
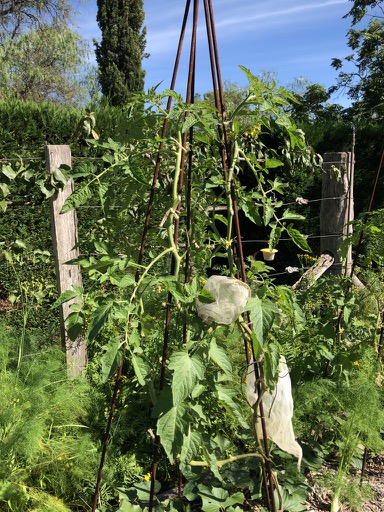
Many tomato plants spent the summer months sulking. Until it rained, we were in dire straits and despite my best efforts, things weren’t going well. But then, they got a whole new lease on life! So I’ve no intention of pulling them out now…they’re strong and sturdy and although it’s late in the day, they’re setting fruit. So for the moment, they can stay right where they are! Fortunately, they’re at the back of the bed: their longevity is something I take into account in my summer planning each year so that at least I can get to work on the middle of the bed in the early autumn months.
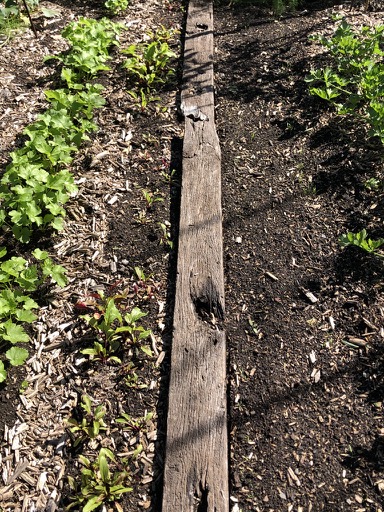
So down the centre, (after taking out zucchinis) I sowed a row of parsnip seed and a row of beetroot…both of which are up and I’ve been thinning them out. To the right of the plank, a couple of weeks later (after a second wave of prep) I sowed a row of parsley root and a row of carrots. I know you can hardly see them here….I’ve only just taken off the light fleece that was covering them ’til I noticed some sign of germination underneath.
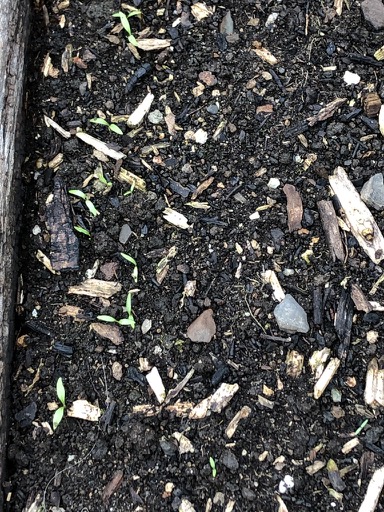
So here’s a close up of just emerging parsley root seedlings…something I experimented with last year and want to try growing more of this year. If this isn’t cause for celebration, I don’t know what is!
A lot of work lies ahead in this winter root veg bed yet. I expect the Wild Sweetie tomato on the front corner wigwam to really hit its stride in the next couple of months and in the meantime, I have seedlings of stock* growing slowly on the potting bench for a row in this bed too, so I can try a repeat performance of last year’s pretty combination.
*Again, there’s reference to growing old fashioned picking flowers in the kitchen garden in podcast episode six!

Time now to walk over to the guild side of the garden…. You can imagine how all that work on the traditional side took up a lot of time and energy…which is why I can never get around to working on the guild side of the garden ’til a bit later in the rotation cycle (and that’s a good thing…causing me to stagger my sowing and planting).
Just to recap, for those who are new to this little spot…the kitchen garden here is divided by the apple arch into two different styles / methods of gardening. To the right of the arch are four beds, each devoted to one family group of veg (legumes, leafy greens, fruiting and root veg); planted primarily in neat and tidy rows and rotated by one in an anticlockwise direction at the beginning of each new season. That’s the traditional side. To the left of the arch are another four beds. While we’ll ignore one (the raspberry cage), the other three are planted in the ‘guild’ style – a completely different method to the beds on the traditional side – instead of rows, the veg are intermingled, in an attempt to ‘confuse pests’. It’s an altogether more relaxed way of growing and has a completely different atmosphere and aesthetic to the traditional side of the garden. Personally I like both and have come to treat and use them in vastly different ways…again…please refer back to the podcast episodes!
Gardening in the ‘guild’ style, means I can work on a little pocket at a time…in small areas rather than overhauling the best part of an entire bed. It’s where I allow many plants to linger to the end of their natural cycle…allowing them to mature, flower and set seed (causing them in turn to become good companions, to look enchanting and ultimately provide the material for my seedbank…see podcast episode four as well as on insta stories under the title Seedbank).
But at this time of the season, just like on the traditional side, it’s time to remove spent summer growth and to work around those still sturdy and fully productive specimens.
So I prepare the little areas in exactly the same way…aerating the soil, adding compost and building structures where I think they will add height and balance.
Then go about planting out seedlings in cylinders…
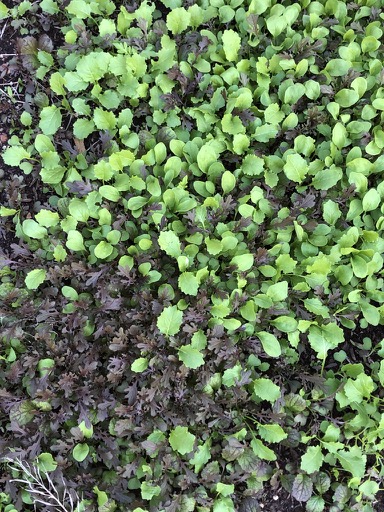
And threading rivers of seed in between…in this case the mustard leaf Red Elk, most of which we’ll eat at this tiny leaf stage…sprinkled over our plates, into salads…wherever the mood may take me.
I’ll sow seed deliberately inside a framework. Made of last year’s fruit tree prunings…these organic shapes that I make up as I go, are useful markers – they delineate where I’ve scattered seed, which can be difficult to remember when not in a straight row! They also help deter pests and go a long way to making up the quirky aesthetic I like to create on this side of the garden.
I say deliberately sow above, because I also allow a lot of self-sowing to go on over here, and this time found myself working around a lot of baby carrot seedlings, so I don’t need to sow many more of those over here just now.
Just a few weeks later and the parsnips are beginning to germinate…yes!
Nearby I used the same technique for a patch of another leaf called Giant Red Mustard. Again, we’ll eat most of these leaves at their tiny stage…I’ll forage them out to add as delicious morsels to our plates, eventually leaving just one plant to fully mature. Its handsome crinkly foliage will look beautiful next to the parsnips as they fill their cage. Around these loose baskets, I’ve dropped in the odd little clump of spring onions, as well as individual herbs and brassicas too.
You can see where gradually I’ve added an individual broad bean box, a tunnel of lettuce, and a pocket of rocket; all the time working around productive capsicums, an aubergine, a couple of big clumps of celery and…
Fruiting tomatoes! Once again, just as on the traditional side of the garden, these were slow to take off in the summer, but are in full swing now…in all three beds.
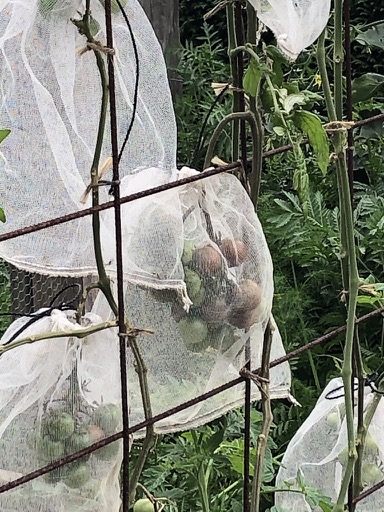
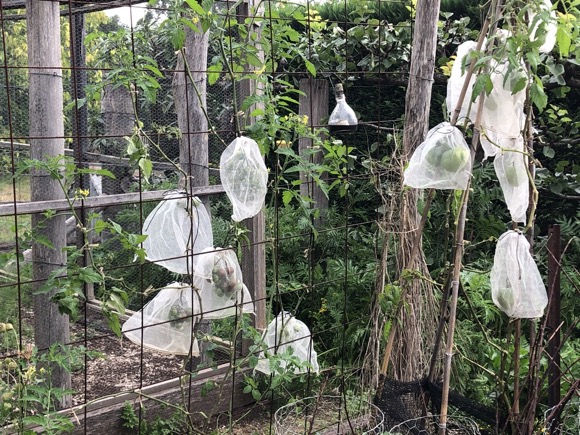
Black Cherry is a favourite cherry tomato, forming lots of fruit in a cluster. For several years I’ve made sure to bag all our fruit…as protection against both bird attack and fruit fly.

Hungarian Heart is another favourite…a large variety with a mellow flavour and dense texture. I can’t wait ’til this one ripens!
Just as an aside…I can’t tell you how often people tell me they must be doing something wrong because their tomatoes aren’t ripening…all I can say is have patience! I reckon we’ve all been coaxed into believing tomatoes are automatically there all the time, and that most of all, they’re to be expected by Christmas. Well in some parts, perhaps. But south of Sydney I can tell you that these large, special varieties honestly don’t do their thing ’til much later. I’d never expect to see one ’til mid February at the earliest. So just keep your cool. Unless you’re in an area prone to early frosts (in which case you’ll need to grow toms under cover), I can assure you they will ripen. Their long journey from seedling to vigorous plant; from flower to sun-ripened fruit is a long one, and now you’re growing them, you will truly appreciate each heavy fruit you pick from the vine. They are not for mindless eating; you’ll never take a tomato for granted again and will relish every precious bite!

In a similar vein, we’re yet to eat a red capsicum here…but I’m hopeful this one will start to colour any day now!
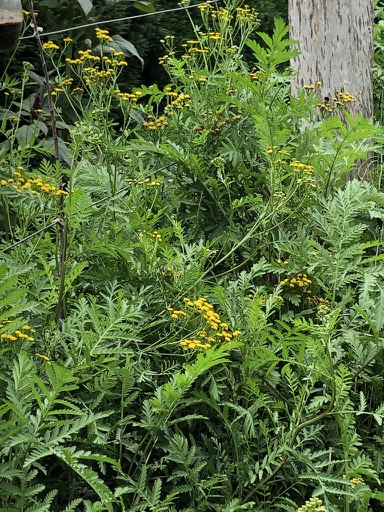
Across the back of the garden, underneath the espaliered fruit trees, companions like tansy and fennel spill out all over the path…
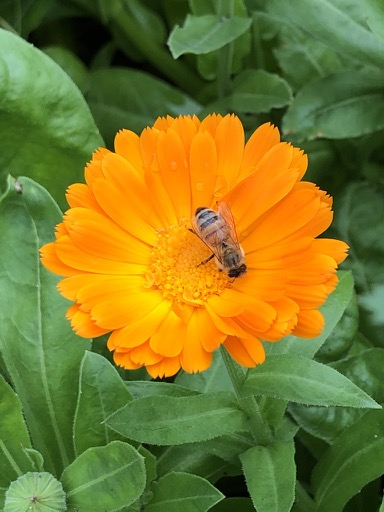
Calendula too, hit their stride in early autumn, providing petals to scatter into salads, or wherever you fancy. I allow them to self sow in the garden…they never travel far and provide fodder for the bees too.
As does the fennel…my perennial favourite!
I hope you’re still with me because it’s time to go down the back! To the drying green…the ‘spillover’ adjunct to the kitchen garden where I can really add to the amount of produce growing here. I’m truly grateful to have the girls here this year to help pitch in with some of the jobs…on the other hand, were they not, I may not be feeling quite so challenged to produce enough food to eat!(Refer instagram stories autumn planting!).
You can see in the image above where I still have the ‘main crop’ cooking tomatoes growing up their stakes. They weren’t as prolific this year as in those gone by, but we’ve still had tray loads of toms to bake. They’re on their last legs now though and when they come out, I’ll plant onions in their place (roots follow fruit…just as leaves follow legumes).
In front of them, is a plot prepped and covered with hessian which I’ll come back to in a moment. We made a single wigwam for peas behind a double row of fennel and sowed a row of beetroot just to one side. Then, in the cage in front, there are rows under wire of kale, broccoli, kohl rabi, and cabbage. They’re under wire because…of the white cabbage moth of course (and all the other pests too!).
Now at that particular moment, I ran out of mulch, which was very annoying and had me scratching my head because as I mentioned earlier, I do NOT like to leave my precious compost exposed to the elements (please refer back to podcast episodes!). What to do? Grab armfuls of saved ‘land cress’ seed, still on the stem and scatter it between the brassica rows! Then crossed my fingers and hoped for the best!
What happened was exactly as anticipated…the little seed pods burst open in the warm sun, spilling their seed all about and germinating. Now they’re beginning to form a living mulch underneath the little brassica seedlings that are growing on well. Why land cress? Because it’s thought (and I say thought…I can’t prove it!) that if cabbage moth caterpillars just emerged from their eggs happen to drop off and munch on the land cress it will kill them! Charming! So you’re thinking…but they’re under wire? I know…but I’ve seen those flitting white moths squash their wings to get inside the cage! And indeed since planting this group, I’ve squashed several tiny yellow eggs laid on the undersides of the leaves so…I’m hoping the land cress can take over this duty now that it’s up!

Which brings me to one of the most exciting little plots in the garden of all…and you may laugh! Podcast followers will know exactly what I’ve done and to be honest, right now, I think this approach to gardening (that I discovered quite by chance some years ago) is perhaps the most valuable thing I’ve ever learned!
One year, I had so much old ‘saved seed’, that I tossed it all into a poorly prepared vacant bed for fun, to see what would happen. What happened was spectacular! We ate like kings from it and what we didn’t eat grew into one of the prettiest plots I’ve ever seen…flowers dancing in late spring sunlight, waving in the breeze…bringing in the bees and ultimately, yielding a whole lot more seed for a similar throwing the following year! I’m now completely addicted to this method!
Although I save the seed individually (here’s a little insight on insta stories under the name seedbank); once I’ve sown specific varieties deliberately in the main kitchen garden (keeping enough back for a second or third successional sowing and some for good luck ‘in the bank’; and once new seed has germinated and is growing on, so I can be sure I’ll have seed to collect again in the spring) I can combine what’s left and toss it around with gay abandon! Which is likely to yield all kinds of surprises!
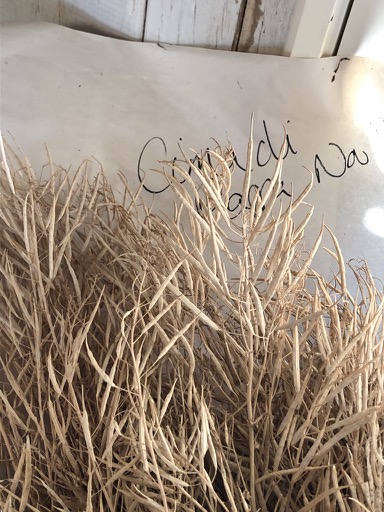
This approach works best with the leaf family…so lettuce and rocket, the mustard leaves I’ve mentioned above and the brassica in this image…Cima di Rappa is a willing player. But also herbs – parsley, coriander, dill…add some parsnip and a few carrots, beetroot and chard. Really…whatever you have and wait to see what pops up. What will pop up…is edible…and that’s the main point. Just be sure not to eat it all…allow some to flower and save the seed in quantities when it dries. Then you too, can play this game forever more. (You can find last year’s version documented throughout the podcast series).
Here is the row of deliberately sown beetroot seed whose young thinnings I can begin to gently prise from the ground and eat…gradually we’ll eat our way through the extras and I’ll leave behind some to form bulbs. By the way….always soak beetroot seed prior to sowing – then drain it on kitchen towel so it doesn’t get stuck to your fingers! The same goes for parsnip.
Whereas this is a slightly more random throwing…but I know in this instance that it’s a mix of Red Elk, Giant Red Mustard and Cima di Rappa. My plan is to leave some of the last to grow on so we can eat its hot broccoli-like stems…in the Neapolitan style. But in the meantime, those tiny leaves are adding considerable zing to our plates every day.

How do you know when to collect seed? Well…look at this stem of Red Elk that’s ‘bolted’ to flower. All down its stem it’s left behind a series of what look like fine stalks…but keep an eye on them…they will swell (from the base of the stem first) and gradually, they will turn from green to brown…check one – split it open with your nail and see if the seed is still green, or if it too, is brown. Once it is, cut the stem to save. I leave them like this, dry on the stem, but if you have time, clip them off and store in a jar in a cool, dark, dry spot. You will have hundreds of seeds from just one stem…think of that! The timing for this one is completely out of kilter…I saved my Red Elk seed on the stem late last spring and those are the one’s I’ve been sowing. They are happiest sown at this time of the year, to grow through the cool months (I wouldn’t sow them in spring/summer).
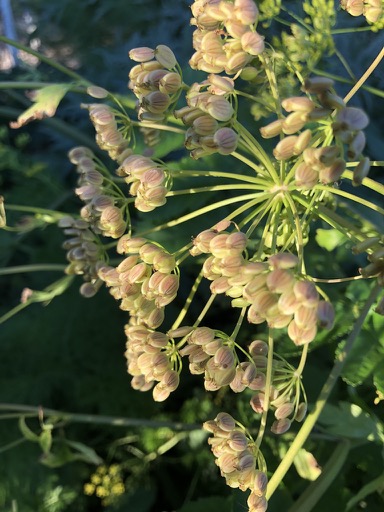
And while this first parsnip flower that’s developed into fresh seed is a bit too green yet to pick…
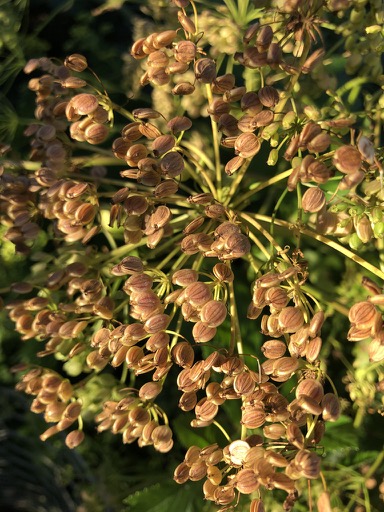
This one, on the same plant, is just about ready to sow….
How I hope this gives you some clues into having fun with your kitchen gardening, with some ideas that are maybe a bit outside the box! You can even make huge dried arrangements with seed on the stem – it’s inclined to be quite spectacular. This is also a lovely way to garden with children…yielding plenty of activities for busy hands as well as learning the true cycle of seed to seed….life to life…and the whole incredible journey that takes place in between. (Again, there are many references to the ‘seedbank’ on insta stories and throughout the podcast audio and notes).
While there’s so much more that I could rabbit on about…
You must surely have had your fill and it’s time for you to get into the garden! (Hopefully…feeling just a bit inspired and not exhausted!). It’s not yet too late in the season to implement any or all of these tasks. Just try to get them done by the end of April and (at least, depending on just where you and your garden are), you ought to scrape in with plenty of food to eat through the winter months ahead.
One more thing….it’s time to sow garlic! This is a task I usually carry out on Anzac Day – see notes with images here in episode eight…where you’ll find a direct correlation with all I’ve described above!). Ooooh…and it’s time to sow poppies too!
Now that the bulk of the planting is done (keeping in mind I’ll continue to dribble in both seed and seedlings over the coming weeks), I’ll move now into nurture mode, which is altogether less energetic! A watering can of cow pat water here, one of seaweed solution there…a week apart; tying in the peas to their upright rods as their growth gathers pace and, until they die back completely, I’ll continue tying the tomatoes to their stakes and pinching out the side shoots each week. We’ll continue to turn the compost…if we can manage, every couple of weeks, but even if we only manage once a month…at least with the turns we’ve already done, I know it will be cooking under that hessian cover!
Please do revisit the podcasts and their corresponding notes. There is an enormous amount of information contained in both. And once this pandemic dies down, I hope you’ll come and visit me here. I fully intend to get inThe Kitchen Garden Days up and running again just as soon as we’re allowed…because nothing equals being in the garden here and learning first hand by its example.
In the meantime, I wish you very, very happy growing. And that you keep fighting fit!
Very best wishes as always,

*Bonnie submitted some pics to an online magazine that she snapped when I was pottering with Clemmie late one Sunday afternoon, deciding where to put some pea frames and picking dahlias before the sun dipped behind the hill…so light duties – more playing than real gardening! To her delight they were accepted and next thing we knew, they requested interviews! If you’re really looking for ways to while away the time…you can visit the article here!
**I also recorded a very spur of the moment IGTV post on instagram…wandering the kitchen garden just on a month ago…it might bring some of these notes to life! I’ll try to do one again next week, for an update! Part one and part two…
***A little bird told me that Neil & Carmen are posting veg seedlings! Without their usual market appearances, keeping up the successional planting of my favourite lettuces is going to be tricky! In all these years I’ve never found lettuces to equal their ‘butter and mignonette’…even when I’ve tried sowing seed from various catalogues! So while I haven’t yet tried this new service which I’m sure they’ll have been scrambling to figure out…you may like to try it…their seedlings are simply the very best! Patio Plants here.